
Hair System Installation
A full head of hair in a single appointment. Every install on Aceman is done by a vetted specialist — scalp prep, custom fitting, bonding, and styling. No surgery, no downtime, no guesswork.
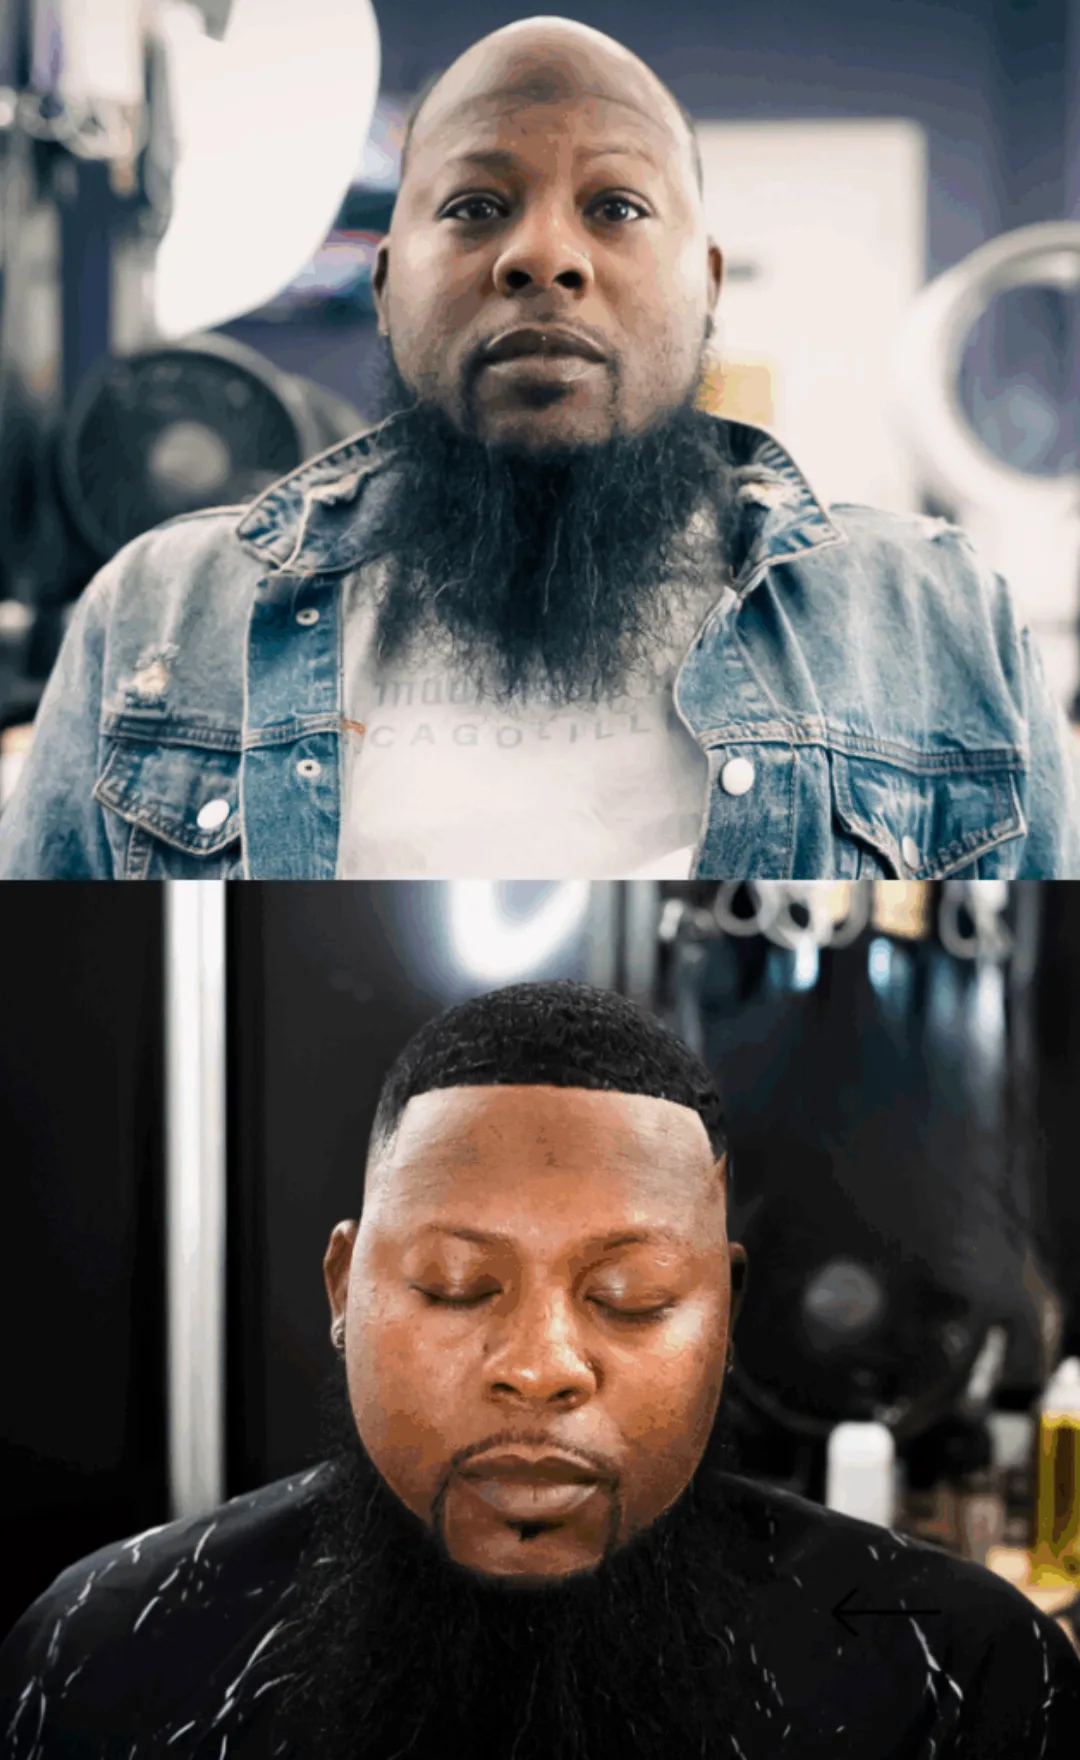
After — finished install
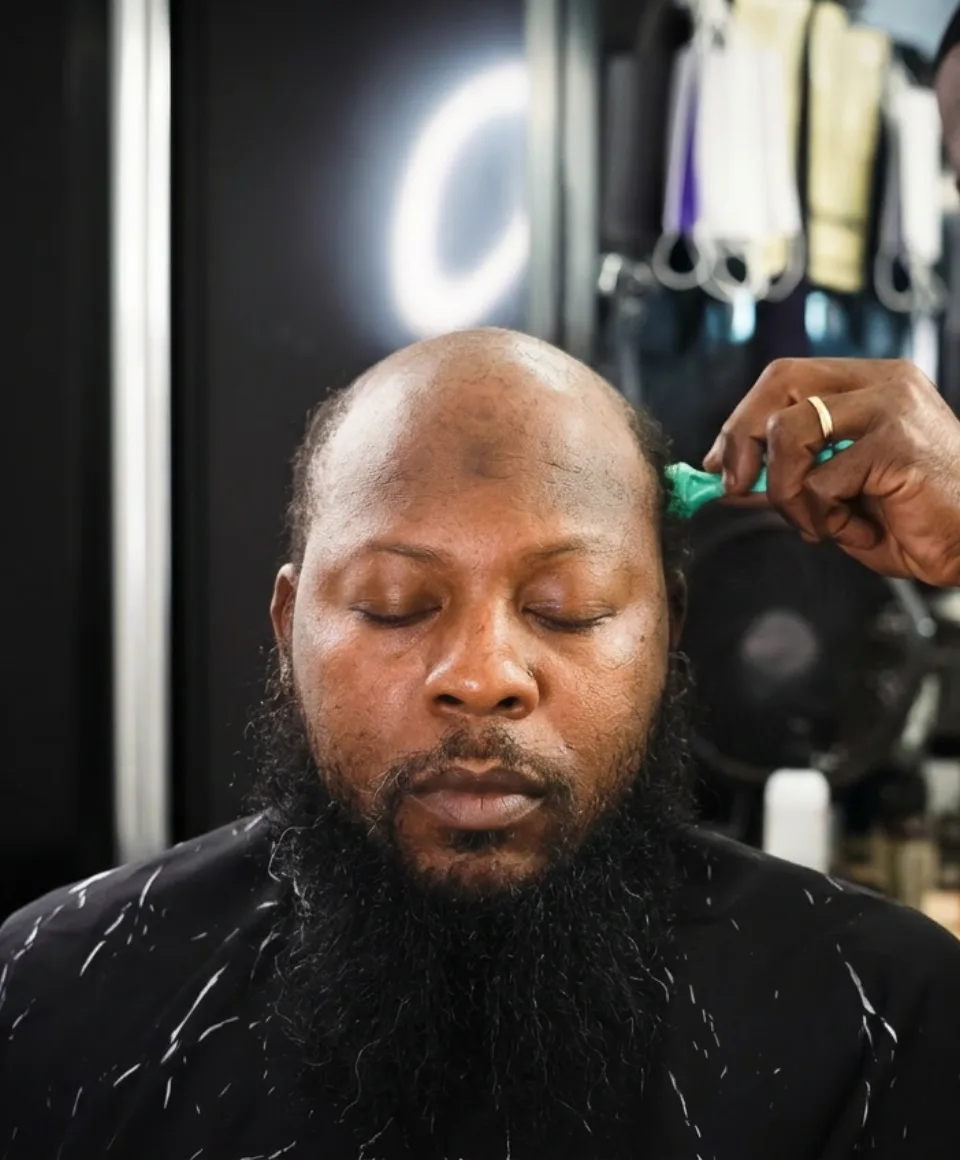
“I was so insecure about my hair because I deal with alopecia. I decided to try the unit out for the first time 2 years ago and I’ve been going ever since.”
What Happens During a Hair System Installation
Installation is the professional service that turns a hair system into a finished, natural result. Your specialist assesses your scalp, orders a unit matched to your hair, then handles every step of fitting, bonding, and styling in a single appointment. For a breakdown of what a hair system is actually made of, from base material to hair type, see our hair systems guide.
Installation is not a quick fix when it is done properly. It is a process with real technique behind it, which is why the specialist matters as much as the unit itself. This page covers exactly what happens on install day, what your specialist uses to bond it, how to care for it in the first 48 hours, and how to tell a good install from a rushed one before you leave the chair.
The Installation Process, Step by Step
Most men are in and out in under four hours. Here is what happens at each stage.
Consultation & scalp assessment
Your specialist examines your scalp and remaining hair, discusses your goals, and confirms a hair system is the right fit. Density, hairline shape, and lifestyle (training, swimming, sleep habits) all factor into what gets ordered.
Unit selection & ordering
Your specialist selects a human hair unit matched to your natural colour, texture, and greying pattern. Base type (lace, skin, or mono) is chosen here too, and the unit is ordered before your installation date is confirmed.
Scalp preparation
Your specialist cleans the bonding area thoroughly, removing oil and product buildup, and may trim fine hair along the perimeter so the adhesive bonds to skin rather than hair. This is the step most DIY installs skip, and it is the single biggest factor in how long the bond holds.
Positioning & fitting
The unit is placed dry first, unbonded, so your specialist can check the hairline against your natural growth pattern from the front, sides, and top before committing to anything permanent.
Bonding
Medical-grade adhesive, liquid or tape depending on the base and your lifestyle, is applied in thin, even layers and left to set. The unit is then pressed into place and checked for full contact along every edge.
Cut & style
Your specialist cuts and blends the unit with any remaining natural hair, then styles it to match your usual look. You check the result in different lighting before you leave. Most men do not recognise themselves in the mirror.
Real Installs, Real Results
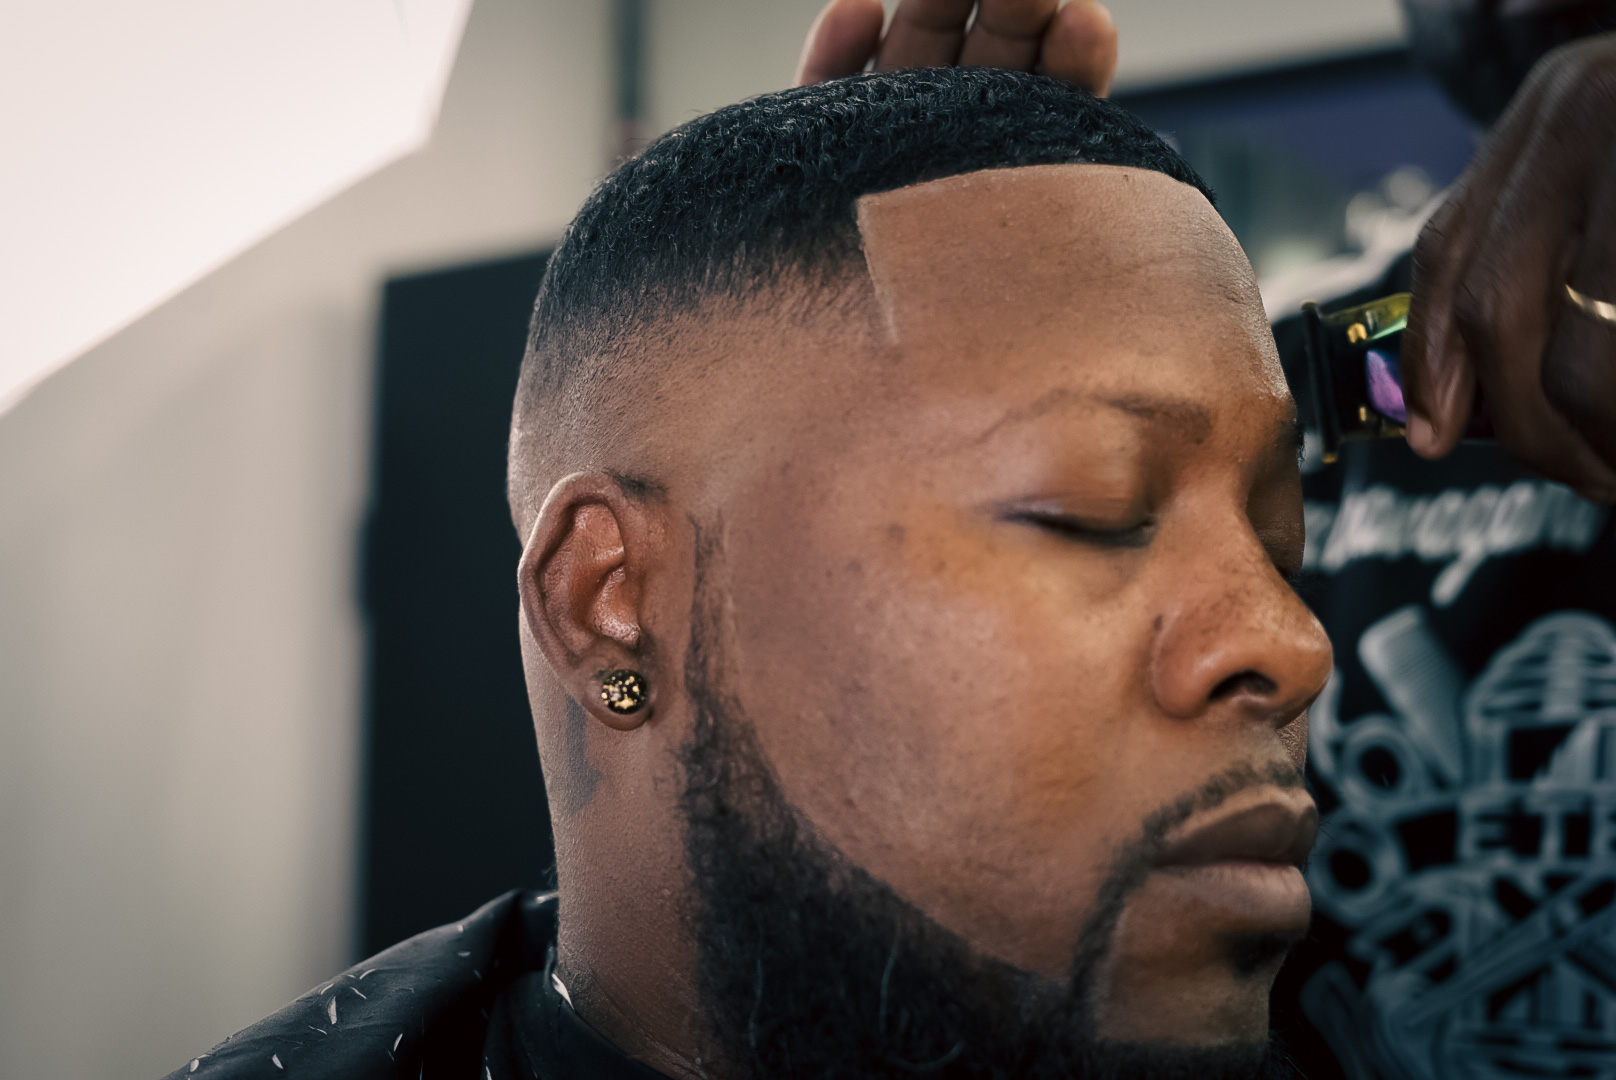
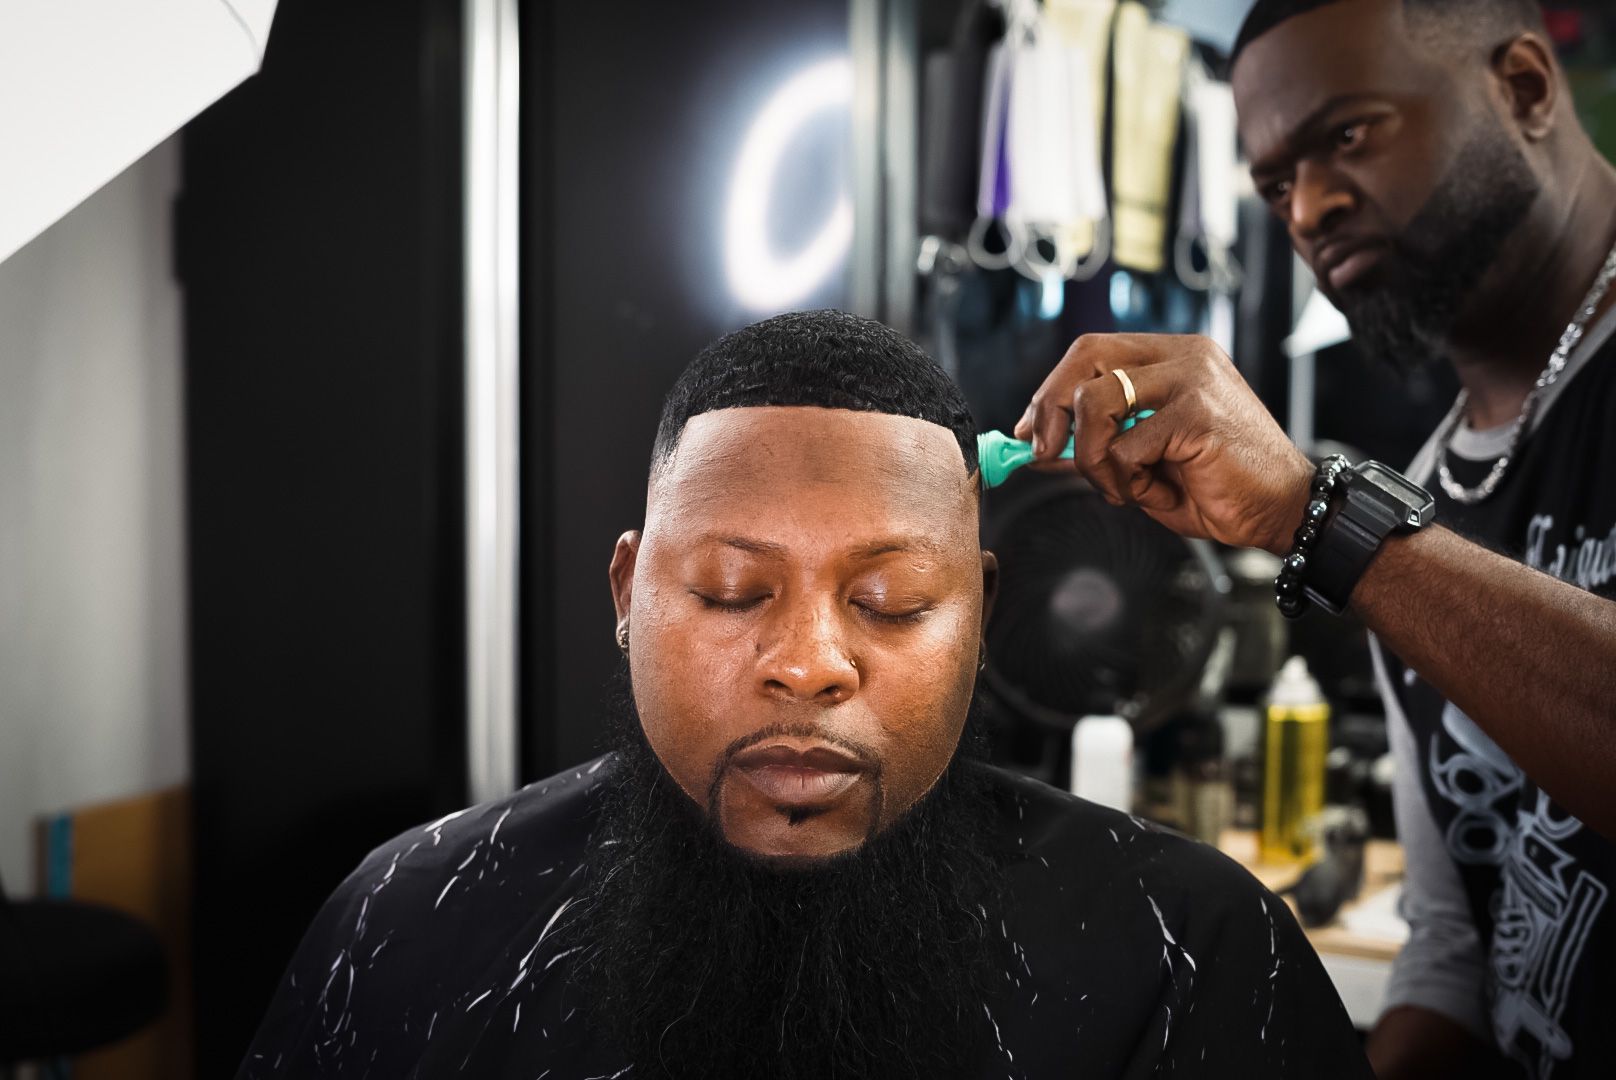
Installed, cut in, and styled in a single appointment.
Bases & Bonding: What Your Specialist Uses
The base and adhesive your specialist chooses decide how natural it looks and how long it holds. Here is the honest trade-off.
Liquid adhesive
A thin coat applied directly to the scalp and left to set before the unit is pressed into place. Bonds strongly along the hairline for the most natural, undetectable edge.
Tape adhesive
Double-sided tape strips placed around the perimeter of the base. Faster to apply and easier to remove without solvent, which suits first-time wearers.
Base match
Lace, skin, or mono, chosen based on your climate, activity level, and how invisible you need the front hairline to be, not a default your specialist reaches for automatically.
Want the full comparison of lace, skin, and mono bases and how each performs long-term? See our hair systems guide.
Aftercare: The First 24 to 48 Hours
The bond needs time to fully cure. What you do in the first two days after installation has more impact on how long it lasts than anything else, including your maintenance schedule.
How to Spot a Good Install
You should be able to tell before you leave the chair. Here is what separates a proper install from a rushed one.
Signs of a proper install
- Hairline looks natural in daylight and under bright indoor light, not just one angle
- No visible demarcation line where the unit meets your skin
- Unit sits flush to the scalp, no lifting at the edges when checked
- Specialist checks the fit from multiple angles before finishing
- No irritation, redness, or discomfort once the adhesive has set
Red flags to raise before you leave
- Visible tape lines or a hard edge where the base meets your skin
- Edges lift within the first day or two, not weeks later
- Scalp redness or itching that does not settle within a few hours
- Colour or texture that clearly does not match your natural hair
- Specialist rushes the fitting check or skips scalp prep entirely
What Does Hair System Installation Cost?
Prices are set by each specialist. These are typical ranges across the Aceman network.
The cost of the unit varies by hair texture, length, density, and base material. Your specialist confirms the full cost at consultation, no surprises on the day. See the full hair system cost guide for a detailed breakdown.
Installing It Yourself vs Booking a Specialist
You can order a hair system online and fit it yourself. It is cheaper upfront, but you are the one cutting, bonding, and blending it, which is where most of the “2 to 4 month lifespan” complaints actually come from. A professional install is texture-matched, template-fitted, and accountable to someone who has to stand behind the result. See the full breakdown of DIY versus professional installation in our hair systems guide.
Hair System Installation FAQs
What happens during a hair system installation appointment?
Your specialist cleans and preps your scalp, positions the unit against your natural hairline, bonds it using medical-grade adhesive, then cuts and styles it to blend with any remaining hair. The full appointment runs 2 to 4 hours.
How long does hair system installation take?
Most first appointments take 2 to 4 hours, covering scalp preparation, fitting, bonding, cutting, and styling. Follow-up maintenance visits are shorter, usually 1 to 2 hours.
Does hair system installation hurt?
No. There is no pain involved in a professional installation. Some men feel mild pressure or tightness along the hairline for the first day while the bond fully sets, and this settles on its own.
What is scalp preparation and why does it matter?
Scalp preparation is cleaning the bonding area and removing oil, product buildup, and sometimes fine perimeter hair so the adhesive bonds directly to skin. It is the step most DIY installs skip, and it is the biggest factor in how long the bond holds.
What adhesive is used to bond a hair system?
Specialists use either liquid adhesive, applied directly to the scalp for the most natural hairline, or medical-grade tape, which applies faster and removes more easily. Your specialist recommends one based on your base type and lifestyle.
How soon after installation can I shower or work out?
Keep the bonded area dry for the first 24 hours while the adhesive fully cures. After that, showering, training, swimming, and sleeping in it are all normal parts of daily wear.
How can I tell if my hair system was installed well?
A good install looks natural in daylight and indoor light, has no visible demarcation line, sits flush with no lifting at the edges, and causes no irritation once set. If you notice a hard edge, early lifting, or scalp redness that does not settle, raise it with your specialist before you leave.
How much does hair system installation cost?
Installation is included in the cost of the unit on Aceman, which runs $250 to $750 depending on hair texture, length, and base material. Ongoing maintenance every 4 to 8 weeks typically costs $75 to $200.
How long does a hair system last after installation?
The bond itself holds for 4 to 8 weeks before needing a maintenance visit. With regular professional maintenance, the unit typically lasts 3 to 6 months, up to 12 with good care.
Can I find a hair system installation specialist near me?
Aceman has vetted installation specialists across 17+ US cities plus London. Use the directory to browse specialists in your city, see their work, and read client reviews before booking.
Book a Vetted Installation Specialist
Every specialist on Aceman is vetted before listing. See their work, compare pricing, and book a consultation, no deposit required to look around.